Getting Started
1. Setting Up Spacebrew
First things first - you need to launch Spacebrew. This requires a server to host the Spacebrew session. Don't worry if you don't have one setup, you can use a public Spacebrew server for now.
LOCAL + REMOTE HOSTING
This method requires a bit more setup, but once installed, Spacebrew will launch a private session that can be hosted locally or remotely. This option is a good choice for long-term projects, client work, and those who want full control over their setup.
// Download Spacebrew from GitHub
PUBLIC SPACEBREW SESSION
If you don't want to setup your own server, you can use our public Spacebrew session hosted on Amazon EC2. We host this session to facilitate prototyping, but be warned that there is just one public session for the whole world that anyone can access. You will see any publishers, subscribers, and routes that other users have established. You will have the ability to route new connections and re-route existing ones. Users will be able to route to and from your publishers and subscribers. Play nice!
// Spacebrew Cloud
Please note: If no other users are connected, the admin site will appear blank.
2. Connecting Clients to Spacebrew
PUBLISHERS + SUBSCRIBERS
In Spacebrew, information sent from connected clients is called a Publisher. Information that can be received and interpreted by a client is called a Subscriber. Each client can have multiple publishers and subscribers.
- booleans (true / false)
- ranges (normalized to a range of 0-1023)
- strings (text)
3. Making Things Talk
Hover over publishers and subscribers to see what other modules they can connect to. Remember, values can only be linked to like values, i.e., a boolean can only link to another boolean, range to range, string to string. Publishers can only be linked to subscribers, and subscribers to publishers - you can not link a publisher to another publisher or a subscriber to another subscriber.
When a connection has been made, a black line will visually pair the connected modules together - now the publisher can speak to the subscriber! Make as many connections as you like - a single publisher can be connected to several subscribers, and a single subscriber can be connected to several publishers.
Spacebrew makes it easy to reroute connections. To break a connection, click on its publisher or subscriber - an X will appear next to the modules it's connected to. Click the X next to the module you wish to disconnect from.
Examples
If you’re just getting started, it may be helpful to download and play with the following examples. They are set up and ready to connect to Spacebrew upon launch - no coding required.
Download Processing Library
A ZIP file that contains the base scripts to communicate with Spacebrew.
Download Processing Examples
A ZIP file that contains the following scripts:
- Base.pde
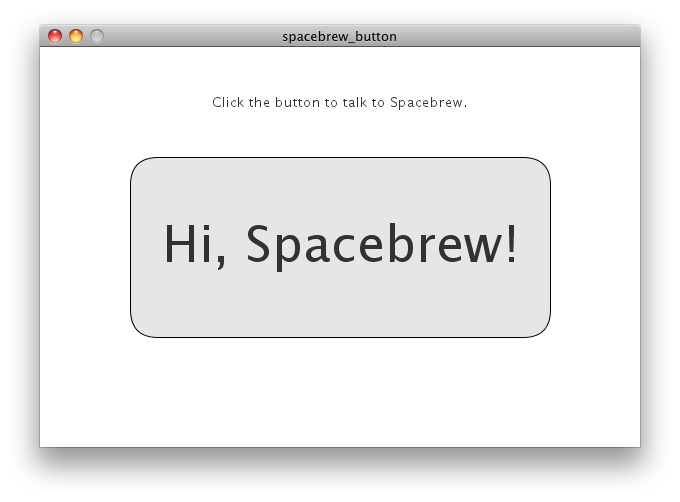
This script launches and connect to the online, public version of Spacebrew. It has all the code you will need to setup publishers and subscribers commented out and ready for a new project. - Button.pde
Launches and connects a virtual button to Spacebrew.
Publishes boolean.
Subscribes to range to control background color.
Subscribes to string to control button text. - Arduino_Button.pde
Connects a physical button to Spacebrew using Arduino.
Publishes boolean. - Powertail_Arduino.pde
Connects a Powertail to Spacebrew using Arduino.
Subscribes to boolean. - Range_Slider.pde
Launches and connects a virtual range slider to Spacebrew.
Publishes range.
Subscribes to range to control slider position.
Javascript Examples
A ZIP file that contains the following scripts:
- Button
This script creates and connects a virtual button to Spacebrew.
It publishes a boolean value when button is pressed, and subscribes to a boolean value, that changes the background color when set to true. - Slider
This script creates and connects three virtual sliders (or linear pots) to Spacebrew.
It publishes and subscribes to three range messages. The sliders function as outputs and inputs. - String
This script creates and connects a text box that sends strings to Spacebrew.
It publishes and sends strings to Spacebrew.
Example Processing button.

Example Processing code.

Example javascript slider.