Here's Clawdia! The robotic servo controlled claw!
/
The most exciting aspect of assembling a robotic mechanism is controlling its movements. This tutorial is a neat illustration into hooking up multiple servo motors to Spacebrew and controlling their movements remotely. You can follow the tutorial and make a robotic claw - or use its directions and manipulate its code to set up and control a servo motor based prototype of your own via Spacebrew.
This claw is composed of three servo motors, and the tutorial shows us how to control each individual motor via Spacebrew.
We affectionately call our claw Clawdia.
Hardware needed:
- Arduino
- The Sparkfun Robotic Claw - MKII
- Medium Servo motor
- The Sparkfun Robotic Claw Pan/Tilt Bracket kit OR Pan/Tilt Bracket
- Small PCB
- Plywood or MDF to mount the claw upon
IMPORTANT NOTE:
The claw specified here is an updated version replacing the Classic Claw (used for the prototype featured here). While both versions of the claw are similar - the Pan/Tilt Bracket kit that Sparkfun features, is designed to fit the older version of the Claw.
We recommend waiting for Sparkfun’s release of an updated Pan/Tilt Bracket kit to match the new claw. Alternatively, you could also try using this one, or try finding one that works at RobotShop.
Software needed:
- Arduino - http://arduino.cc/en/Main/Software
- Processing - http://processing.org/download/
- Spacebrew Library for Processing
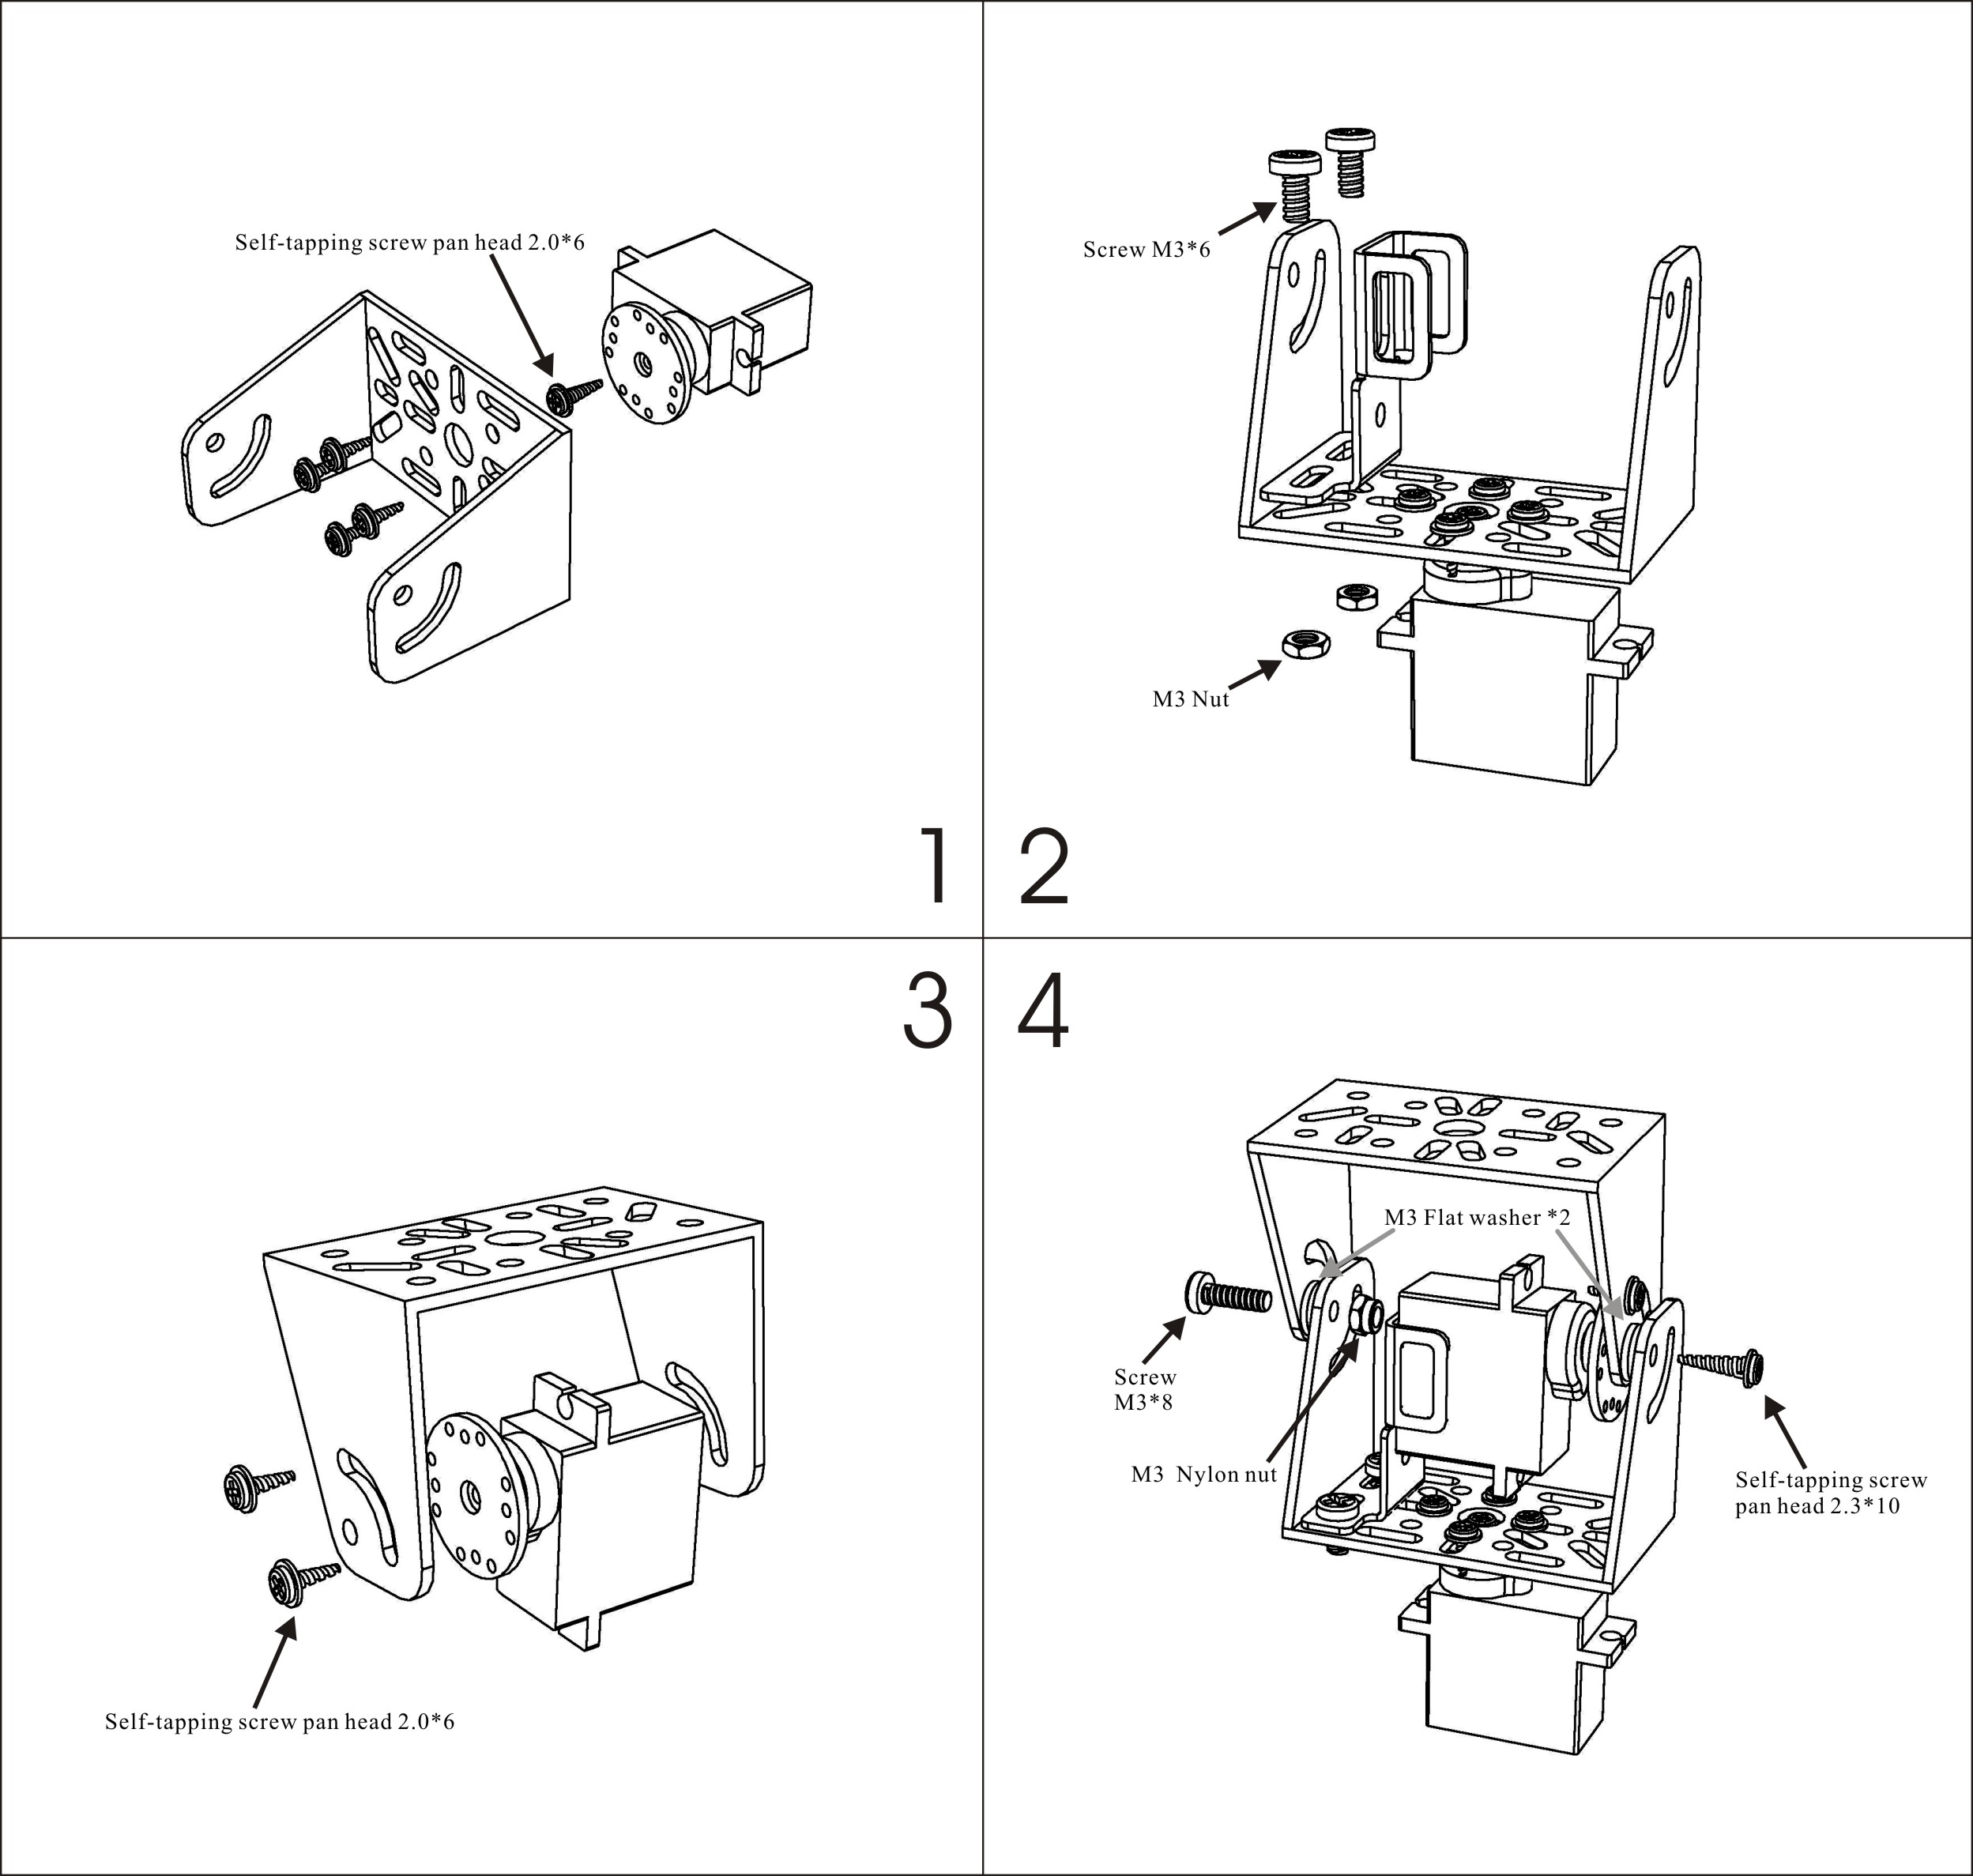
Step 1: Assembling the Robotic Claw MKII
- Sparkfun has a helpful tutorial outlining the assembly of the claw.
NOTE: This assembly tutorial is meant for the earlier (now discontinued) version of the claw. The new release is quite close to the previous - and we hope this will still be helpful to you.
Step 2: Assembling the Robotic Claw Pan/Tilt Bracket
- Assembly diagram for the Pan/Tilt Bracket kit are available on the Sparkfun product page.
- Assembly diagram for the Pan/Tilt Bracket.

Step 3: Making a mounting base for the Claw
- Clawdia requires steady mounting onto a base as it moves, to reduce vibration from the motors. We constructed a simple flap bracket that we use to set the system atop a shelf and clamp it in place.
As you can see, we drilled a hole of approximately 1” dia. in the front flap of the bracket for the servo wires to go neatly through and plug into the Arduino Uno mounted onto the back of the wooden flap.
This is a fairly basic construction that makes the Claw easily portable while keeping the Arduino accessible. The clamp holds the claw tight and dampens vibrations caused from the servos - allowing for smoother movement.


While the Arduino itself is screwed into the plywood of the flap, we used a small regular PCB piece to collate all the power and ground wires from the servos. These then attach to the GND and 5V pins on the Arduino. The servos are attached to pins 9, 10 and 11 on the Arduino.


The Pan servo is screwed into the front flap as well (see pics above). To accomplish this using the tiny screws that come with the servos - we drilled partially through the wooden flap, before screwing the servo into place.
Step 4: Uploading the Arduino Code
Assuming you have wired everything up correctly, you are ready to load the software onto the Arduino that informs the motors. If you have never used Arduino before there are some great getting started resources here.
Once you have the Arduino installed, you can test each of the three motors independently using the Sweep example from the Arduino example sets:

Testing done, we now move to the Arduino code for Clawdia. You can copy and paste the code from here into your Arduino window and press upload.
Step 5: Installing the Spacebrew Processing Library
To install the Spacebrew Processing Library, refer the Spacebrew Tutorial: Connect an Arduino Project to Spacebrew via Processing tutorial. You can get the the Spacebrew Processing Library from GitHub or download the zip from here.
Step 6: Installing the Spacebrew Processing Library
Now you can copy and paste this code into your processing window and press play:
Step 7: Publishing on Spacebrew
If this worked you should see it in the Spacebrew admin page.
Note: if you do not see clients, publishers or subscribers on your admin page try it with another browser - we have mostly tested this with Chrome and have on occasion had issues with Safari and Firefox.
If it worked correctly it should look like this:

The name "Meet Clawdia" comes from the 3rd line of the processing code and is the name of your Spacebrew node on the admin. Try changing this to your name and you should see it reflected in the admin.
You should choose a name that tells other persons using Spacebrew something about what your node does so they can subscribe or publish to it.
Step 8: Connecting nodes
Now that we have set up Clawdia and had it appear as a set of nodes on the admin, we shall try to connect it to another set of nodes - and control the motors through these other nodes.
The easiest way to do this is to use one of the Javascript examples in a browser. Simply click on the link above to open the Java script Slider example that is pointing at the Spacebrew browser in the cloud.
It should look like this:

Remember to give your client a unique name. You can add your unique name after the "name=" in the query string and press enter to re-load the page with your unique name.
Back at the Admin page, the Slider node client shall now appear on the browser:

Since our Processing sketch is publishing information of the type RANGE we can connect this output to any of the lines. Click on the word “grabWithPrecision” in the bright green box that is the subscriber of the Bargraph value and then Click on the word “slider1” in the blue box that is the publisher for the Slider client. Now you should see a line connecting these two.
Similarly connect “rotate” to “slider2” and “swing” to “slider 3”.
It will now look like this:

Success!
On the Slider client page, slide the input Sliders left and right to see each of Claudia's motors move accordingly.
Yay!